The online D-Visa application has to be filled out before the appointment takes place. With some embassies even before you can book your appointment time (in this case, you can make another visa application right before the appointment).
Before opening the application site, make sure you have your passport, flight, accommodation, and private health insurance bookings nearby. Once the online application form has been submitted, save the PDF of the completed application, print it out, and bring it with you to the visa appointment.
NOTE: It is not possible to amend the application after it is submitted. If you need to change something, you should submit a new application. The visa application should reflect the correct and accurate information only.
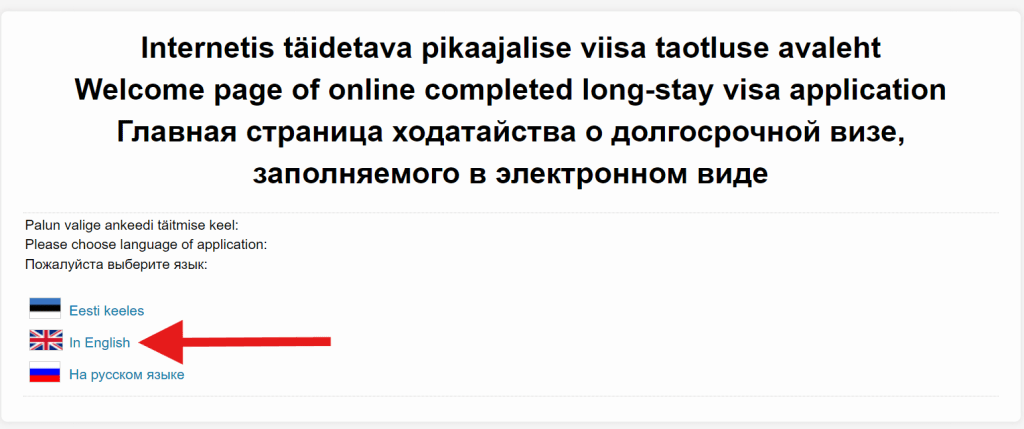
1. Go to eelviisataotlus.vm.ee
Select ‘In English’ under ‘Long-stay D-visa application”
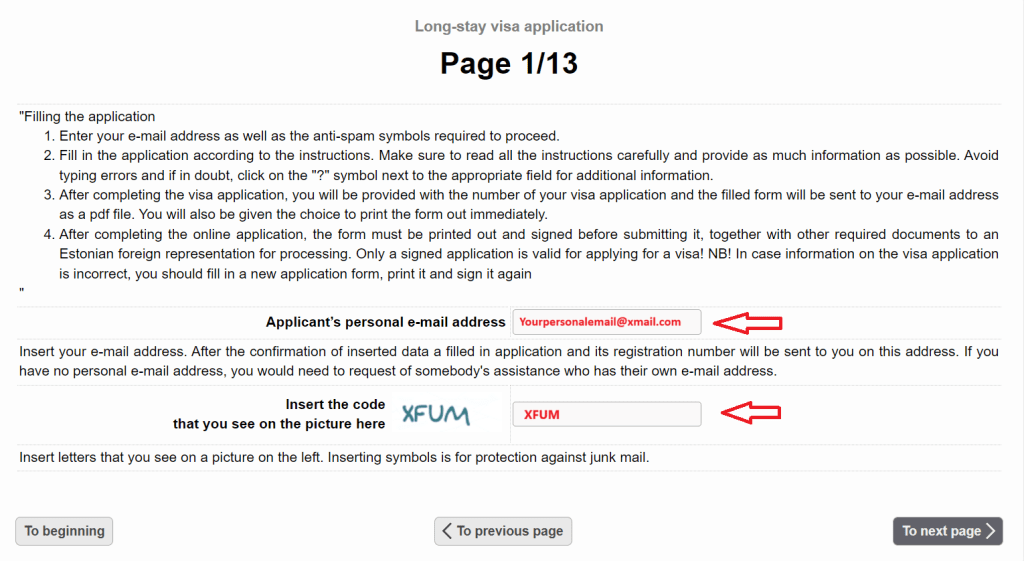
2. Read the instructions carefully
- Then, enter your personal email address in the first blank. You will receive a copy of the filled visa application form to that email once the form has been submitted.
- Insert the code you see on the screen and select ‘To next page’.
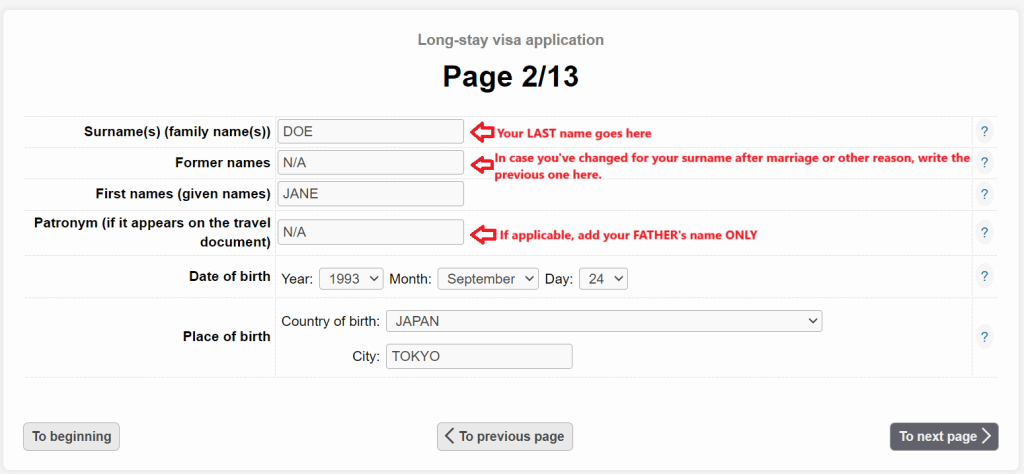
3. Enter your details
- Enter all of your names exactly as per your passport and select ‘To next page’.
4. Enter the personal details requested
- Make sure that the first nationality field matches the information in the travel document (passport) you will be using.
- If you hold dual citizenship (passports), please also add information about that.
- Once done, select ‘To next page’.

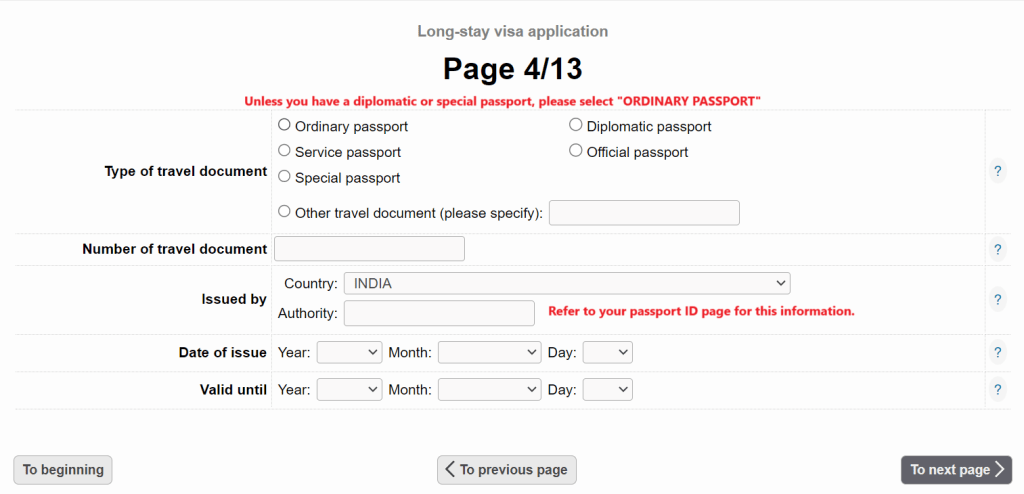
5. Enter your passport details
- Make sure you enter all the passport details correctly, as seen in your travel document! Then select ‘To next page’.
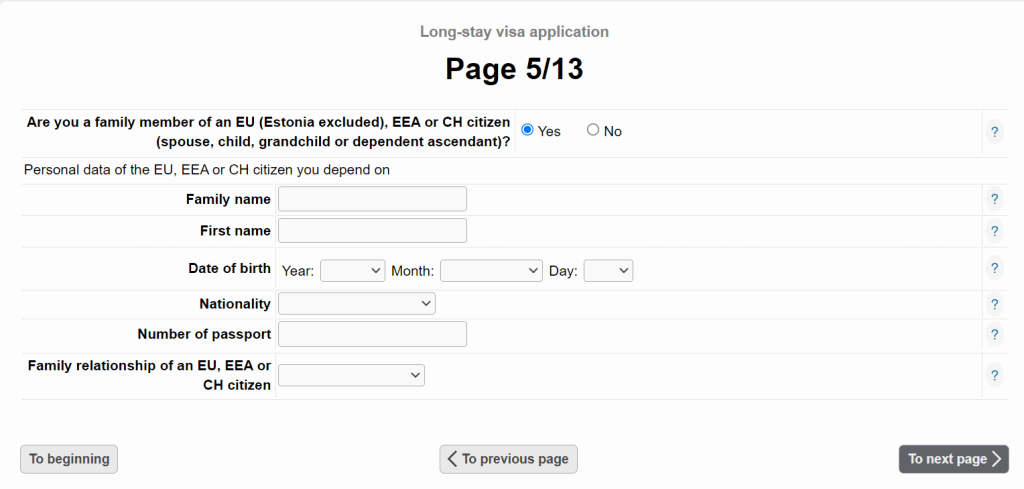
6. Enter details about your close relatives (if applicable)
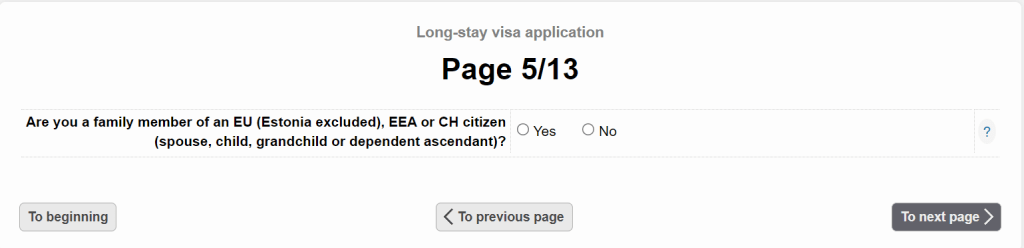
- Page 5/13 asks whether you have any close relatives that are EU/EEA/Swiss citizens (passport holders). Note, that if you have a close relative that holds an EU/EEA/Swiss right of residence (i.e. temporary residence permit card or else), this does not count as citizenship!
- If you don’t have any close EU/EEA/Swiss citizen relatives, select ‘No’ and ‘To next page’.
- If you have such a close relative, fill out the information as requested in the form and select ‘To next page’.
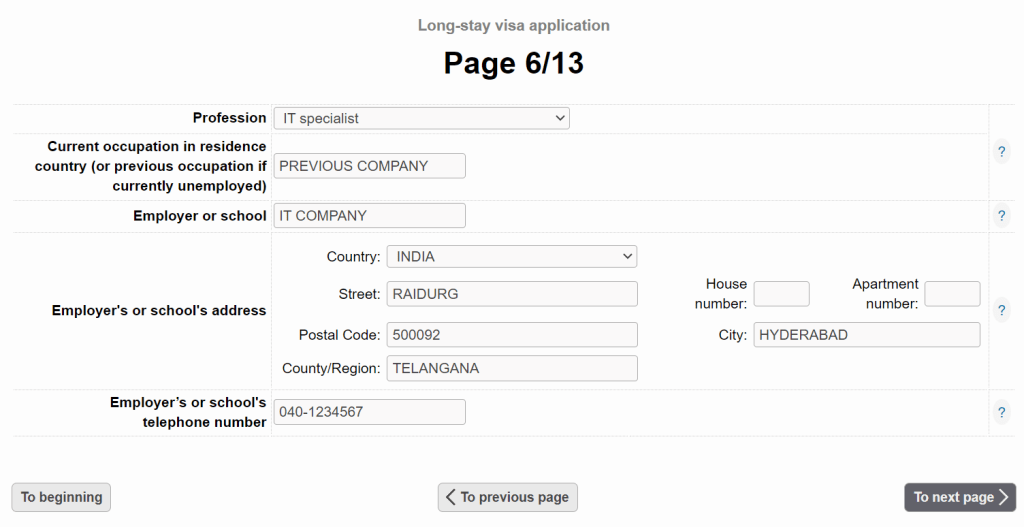
7. Enter your current employment details
- The fields on page 6/13 are not related to your upcoming employment at Wise!
- Please mention the details of your previous employment or education. Note that adding a complete address is necessary.
- At the time of submitting the application, if you’re still employed, please insert all the requested information about your current position and the employer, then select ‘To next page’.
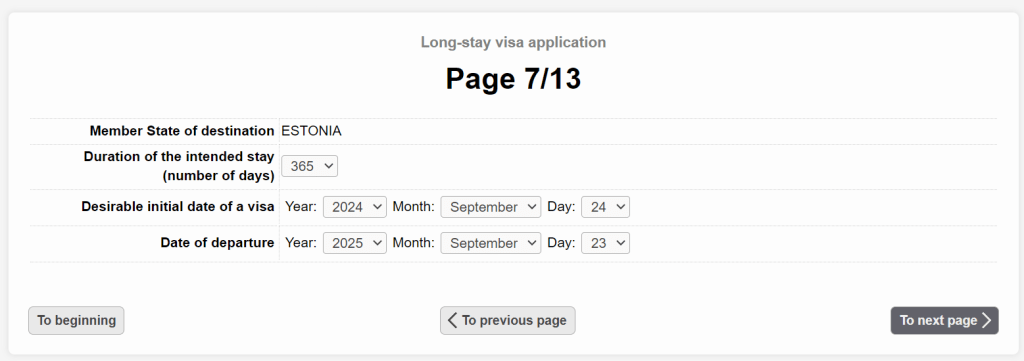
8. Enter details about your travel to Estonia
- ‘Member state of destination’ will be pre-selected for you, as this is the Estonian D-visa application form.
- Enter the required details, select the date when you want your visa to begin and the day you’ll depart from Estonia.
- Be sure to double-check the ‘Duration of the intended stay’ using this calendar calculation and choose the right number of days from the drop-down selection.
Note that the period of the visa cannot exceed 365 days.
9. Mark the purpose of your visa application
- Select ‘Short-term employment’ as the purpose if you are applying for a visa for employment.
- If you are applying for a visa to accompany a family member, select ‘Visiting family or friends’. Then select ‘To next page’.

10. Add details of your temporary accommodation in Estonia
- From the drop-down menu select the correct Place of Stay
- Enter the accommodation details and make sure to match them with the booking confirmation you’ll present at the embassy during your appointment.
- If you are staying with a private person, select the option from the drop down menu and mention the person’s full name and address. Remember, you will need a written and signed confirmation from the host.
- Once complete, select ‘To next page’.

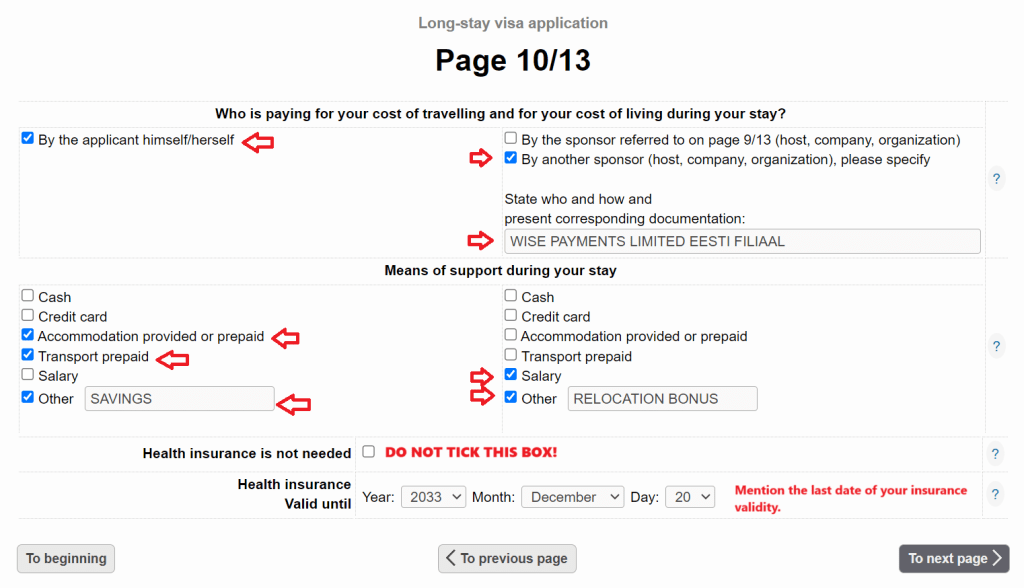
11. Explain your financial means
- If you are applying for a visa for employment, choose “By the applicant himself/herself’ and ‘By another sponsor (host, company, organization)’.
- Add the full name of Wise Estonia (Wise Payments Limited Eesti filiaal).
- As a means of support under the applicant column, select ‘Accommodation provided or prepaid’, ‘Transport prepaid’, ‘Other’ and type ‘Savings’ in the box. You have to be able to prove to the embassy that you have some funds to support yourself until your first salary in Estonia.
- As a means of support under the company column, select ‘Salary’ and ‘Other’ and type ‘Relocation bonus’ in the box.
If you are applying for a visa to accompany a family member, add the full name of the sponsor (spouse/parent) instead of Wise and select ‘Accommodation provided’, ‘Transport prepaid’ and ‘Other’, and write in the box ‘Sponsor’s salary and ‘Savings’’.
- Add end-of-insurance date details as seen on the confirmation page of the insurance you have purchased.
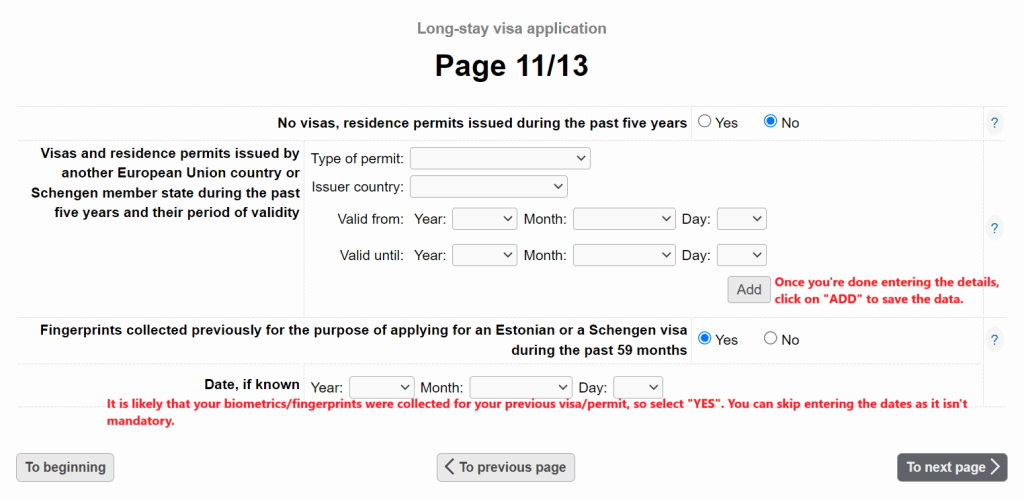
12. Details about previous or current Schengen visas or residence permits
- On this page, you are required to list all previous or currently valid Schengen visas or Schengen residence permits you may have had over the past 5 years.
- If you have not been issued any Schengen visas or residence permits, select ‘No’ in both of the boxes and select ‘To next page’.

- If you have (had) any Schengen visas or Schengen residence permits over the past 5 years, add the requested information about these. Once the information is added for a visa/residence permit, click add to make sure the information is stored before moving forward.
- If you have had more than one, add all of these here. Once done, select ‘To next page’.
13. Enter your current contact details
- This includes your home address in the country you are moving from, your personal phone number and your personal email address. The embassy will use these to contact you about your application (status), so make sure these are correct!

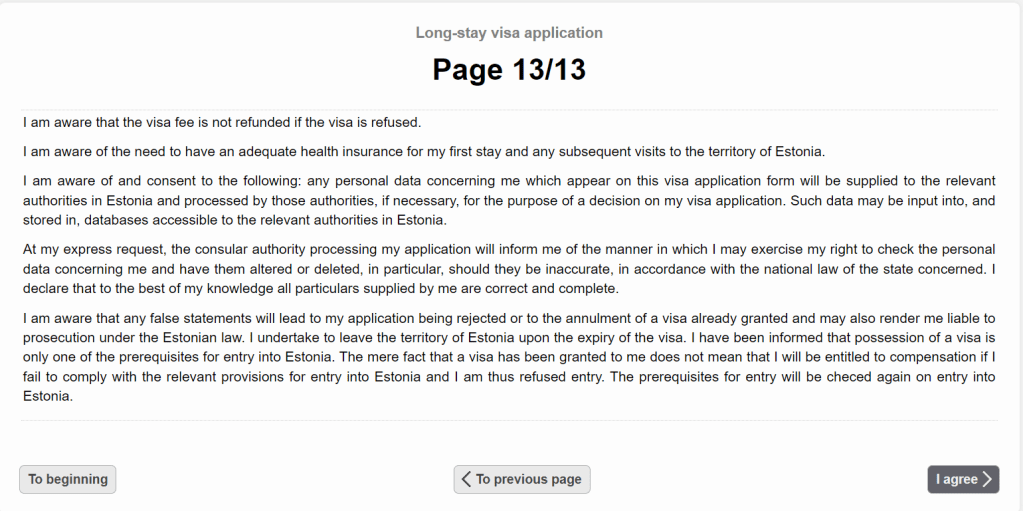
14. Confirmation
- Now, all the required fields for the online visa application have been completed, but the application has not yet been submitted.
- Read all the information on page 13/13 carefully.
- To submit the online visa application, select ‘I agree’.
15. Download the completed visa application form
- On the last page, you will see the opportunity to save a PDF document with the information you have just submitted.
- Please save it on your computer just in case the email doesn’t come through.
- You should also receive a copy of the document in your email once the online visa application has been submitted.
- Save the document from the online site and from your inbox.
Before your visa appointment, print the document out, sign it at the required places at the bottom of the pages and add the date of the visa appointment to the date fields. Then submit it with the rest of the required documents.